Installation
Tagger is available in two forms: a web app (PWA) that runs in any modern browser and can be installed on almost any device, and a native desktop app for Windows and macOS. Both versions deliver the full Tagger experience — choose whichever best suits your workflow.
Web App (PWA)
The Tagger web app is a Progressive Web Application (PWA). PWAs can be installed directly from the browser onto your device — no app store required — and work across smartphones, tablets, and desktop computers. Once installed, the app behaves just like a native app and can be used offline.
Recommended browser: Google Chrome. While Tagger works in most modern browsers, Chrome is recommended to ensure full functionality across all features.
Visit tagger.teamoppy.com to get started.
Android
- Open Tagger in Google Chrome.
- Tap the three-dot menu in the top-right corner.
- Select Add to home screen.
- Confirm by tapping Add.
- The Tagger icon will appear on your home screen.
iOS
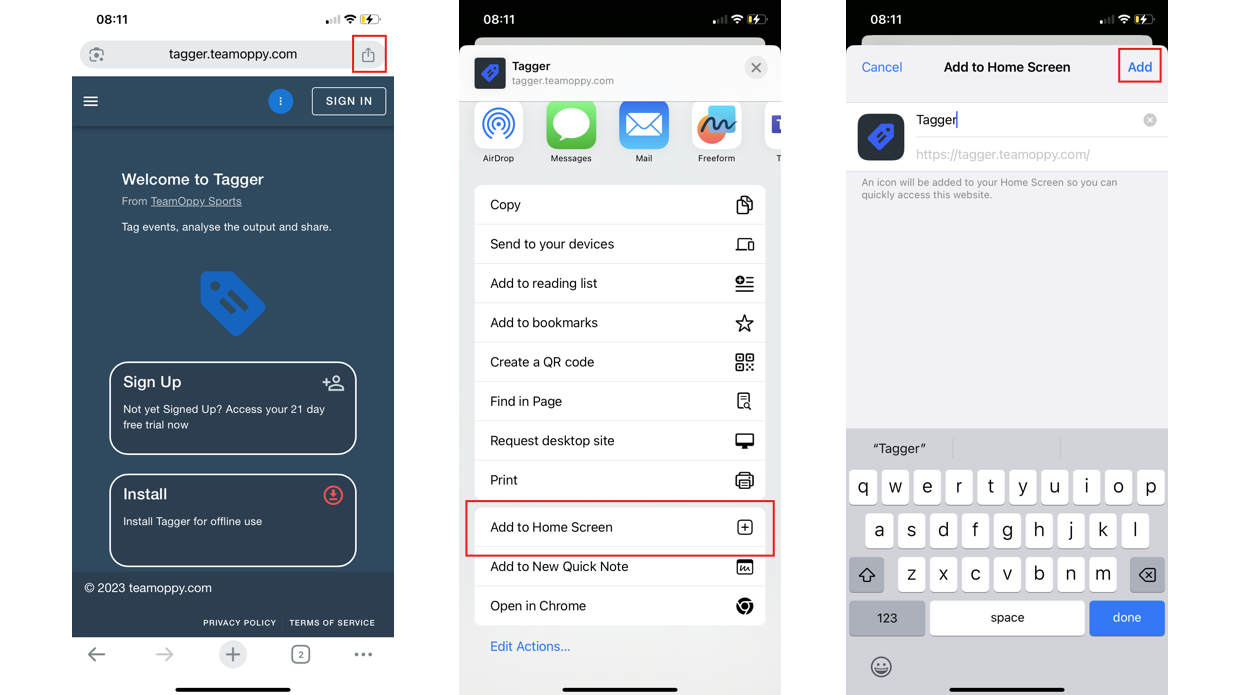
Chrome (Recommended)
- Open Tagger in Chrome.
- Tap the share icon (square with an upward arrow).
- Select Add to Home Screen.
- Confirm by tapping Add.
- The Tagger icon will appear on your home screen.
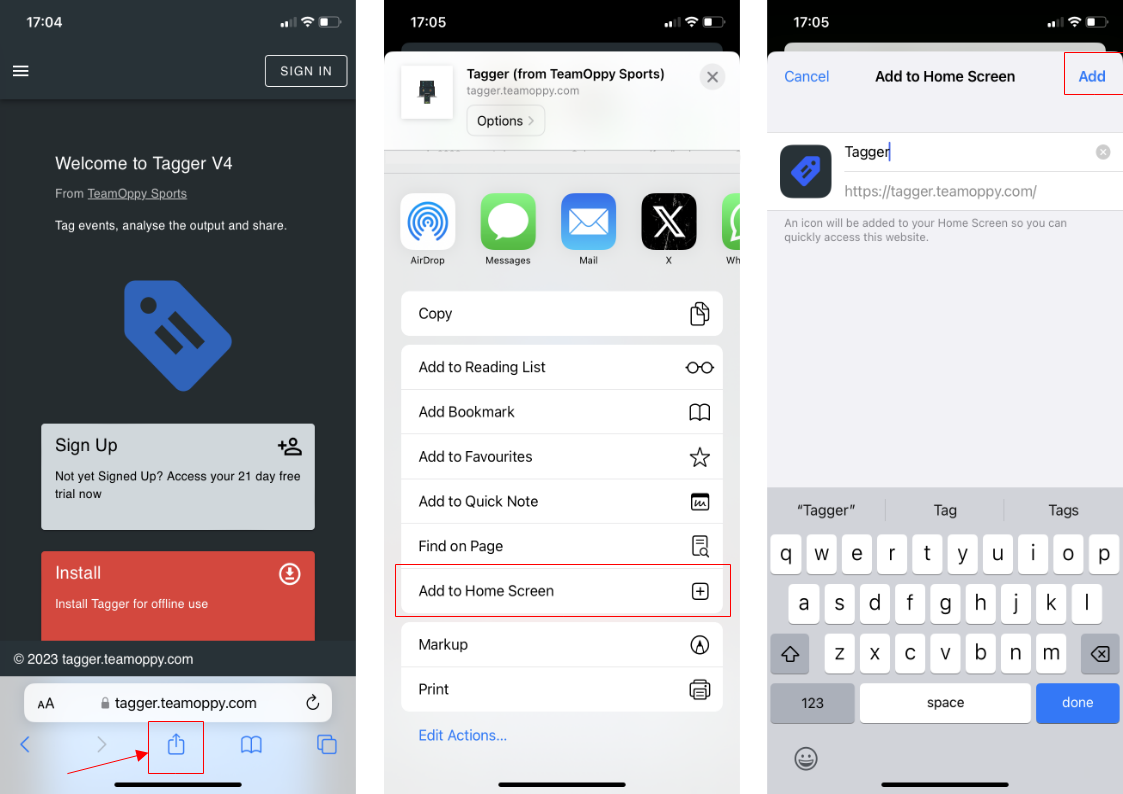
Safari
- Open Tagger in Safari.
- Tap the share icon (square with an upward arrow).
- Select Add to Home Screen.
- Confirm by tapping Add.
- The Tagger icon will appear on your home screen.
Desktop (Browser)
- Open Tagger in a PWA-compatible browser (Chrome, Edge, or Firefox).
- Click the install icon in the address bar, or open the browser menu and select Install Tagger.
- Confirm the installation when prompted.
- Tagger will be added to your applications and can be launched independently of the browser.
Desktop App (Beta)
A native desktop application is now available for Windows and macOS, offering tighter OS integration and enhanced video playback performance. In addition to everything available in the web version, the desktop app includes exclusive features:
- Live video capture — capture directly from connected video devices during a session
- HLS to MP4 converter — convert HLS streams to MP4 for local use
- Trim & Copy — trim and copy video clips without leaving the app
- Auto-save to local database — games are automatically saved to a built in app database, ensuring your data is always preserved even without an internet connection
This is a beta release. If you experience any issues, please report them to info@teamoppy.com — your feedback is greatly appreciated.
Windows
Tagger Desktop is available through the Microsoft Store, which handles installation and future updates automatically.
- Open the Tagger Desktop listing on the Microsoft Store, or search for Tagger in the Microsoft Store app.
- Click Get to install.
- Once installed, launch Tagger from the Start menu.
macOS
- Download the latest
.dmginstaller from the Launchpad. - Open the downloaded
.dmgfile. - Drag the Tagger app into your Applications folder.
- Launch Tagger from your Applications folder or via Spotlight.
Security prompt: On first launch, macOS may display a warning that the app is from an unidentified developer. To proceed, open System Settings → Privacy & Security and click Open Anyway.
Offline Use
Once installed, Tagger can be used without an internet connection. To ensure offline access, make sure you are logged in before going offline — authentication requires connectivity.
No internet? Use a mobile hotspot.
If your device is offline and you are not yet logged in, you can share your phone's mobile data connection as a Wi-Fi hotspot. Connect your tablet or laptop to that hotspot, log in to Tagger, then disconnect and continue working offline. See How to Turn Your Phone Into a Wi-Fi Hotspot for device-specific instructions.
If you have any questions or need further assistance, please contact us at info@teamoppy.com.
