Tagger - Video Studio
Generate playlists, add graphic and text overlays, export to mp4
Introduction
The Tagger Video Studio provides a powerful video editing and exporting experience including the following features:
- Automatic Playlist generation from the Timeline Chart and Matrix or create Custom Playlists
- Export to MP4 file or Webm file
- Background export processing with quality and consistent results.
- Graphic buttons
- Easy timeline & video synching
- And more...
How to access the Studio
- The Studio is built into Tagger. After you have tagged your game simply navigate to the Studio page. This is available to users of the Analyst Plus package and above.
Overview
The video below provides an overview of the Studio.
Video Sync
In general if you have tagged your video in Tagger timeline will be in sync with the video.
However, in some scenarios for example if you have tagged a game live without video then your timeline may not be in sync with the video. The Studio provides the ability to sync the timeline with the video.
Open the Timeline tab, then click Sync Mode in the toolbar to open the guided sync panel. Pick an event you can identify in the video, move the video to where that event happens, lock that position in, review the shift and apply it. See Synchronize Video for the full workflow.
The Timeline
The Timeline section of the Studio shows your tagged events against the video, with period markers and a playhead, and is organised into five sub-tabs: Timeline, Matrix, Clips, Custom Playlists and Merged Timelines.
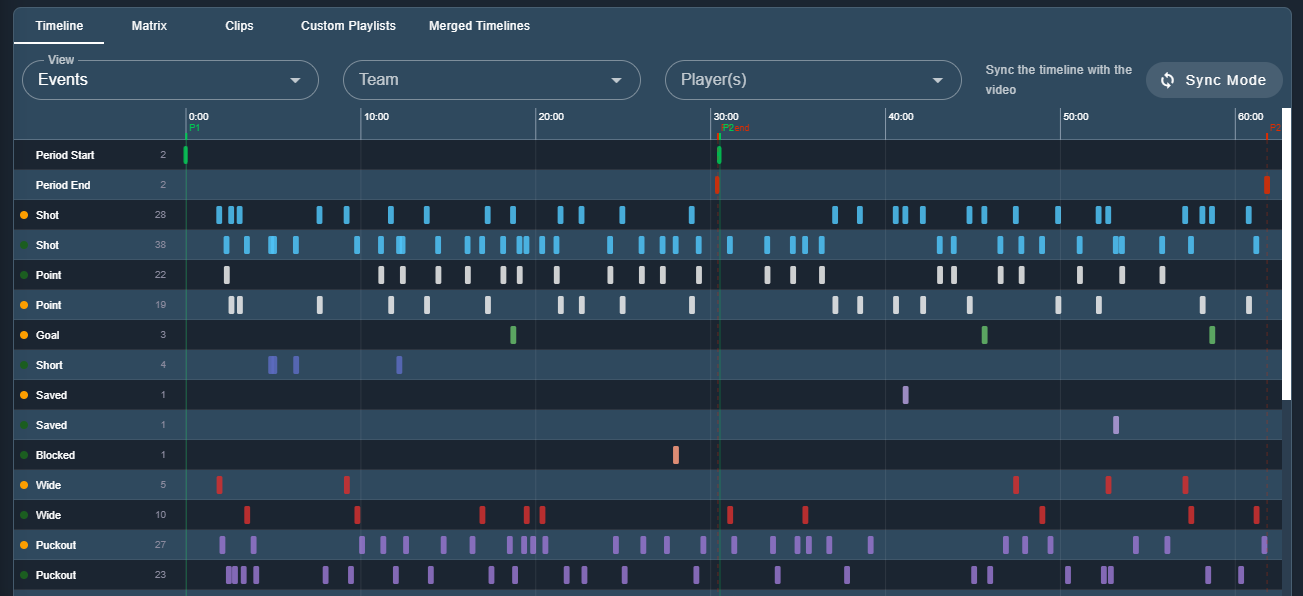
Use the filters above the chart to narrow down what you see:
| Filter | Description |
|---|---|
| View | Events, Linked Events or Players. |
| Team | Show only one team's events. |
| Player(s) | Show only the events for the players you select. Player(s) lists the players of the team chosen in Team, so pick a team first. |
Each row is one event type for one team, with the total number of events on that row. Click a bar to play that event's clip, or click a row label to load every event in that row as a playlist. See The Timeline for details.
Drawing Tools
The video below shows how to add graphics and text overlays to clips, edit and also delete the layer. Overlays will be exported with the clip.
Export Options
Click Export above the playlist to open the Export screen. Exports are processed in the background and finish with a message showing where the file was saved. Use the Advanced Options tab to control how the video is produced:
| Option | Description |
|---|---|
| Merge overlapping clips | When clips have overlapping start and end times, merge them into a single clip. On by default. |
| Include Clip Details Overlay | Add a text overlay to each clip showing the event details. |
| Include event comment | Add the event's comment above the details chips in the overlay. Requires the clip details overlay. |
| Include audio | Keep the original audio in the exported clips. Off by default, so exports are silent. |
| Video Codec | The codec and output container for the export, by default H.264 in an MP4 file. |
| Video Bit Rate | The bit rate in kbps. Leave blank to match the source video. Higher bit rates give better quality but larger files. |
Include audio
Audio is off by default, so an export is silent unless you switch Include audio on.
When it is on, each clip's audio is normalised to 128 kbps stereo so the clips can be joined into one continuous track, and the audio is held while a drawing overlay is displayed so it stays in step with the picture.
Audio export needs an environment that supports the WebCodecs audio encoder. Where it is not available, the Include audio switch is disabled and the export is silent.
Unlike the other export settings, Include audio applies to the export you are about to run. It is not remembered for the next one.
See Exporting a Playlist for the Analytics 360 playlist export screen, which offers the same audio option.